Hello, readers welcome again, in this post, we going to learn How to migrate Website from one Hosting to another. You have seen most of the bloggers start blogging with a cheap hosting but soon they realize that that is their biggest mistake. Afterwards, they have to purchase Hosting and face many problems while migrating. Also, They need to change their hosting to Get Better Results and Good rankings.
Migrating your website from one hosting to another hosting panel can be a tough work but if you follow each step mention in this article it will help you a lot in changing your hosting.
Table of Contents
Things to do before Migrating your Website
One wrong hosting can ruin your blog and your blogging experience. If you are using any free hosting then it is more dangerous for you. Think twice about the platform you are working. Is it safe and reliable? Now think how scary is it. Your one mistake can make you rank your blog from starting and it is like hell Jesus. I cant write 50 posts again & again and wait for months to rank blog on a search engine.
Whenever you have got the need to change your Hosting then it is very important to learn all the necessary tips for easy transfer. To know about Upcoming Mistakes and their solutions Read this article fully. It will help you a lot in migrating your blog.
Before starting with Hosting Migration do you know how to choose the best Hosting? Before starting hosting transfer You should go with Turbo Speed Web Hosting. You must give your eye on these points on purchasing hosting.
- Incredibly Fastest & Reliable Hosting.
- 100% Uptime
- Bandwidth
- Secure Hosting.
- SSL Certificate (If Needed).
If you note the first point you will get many hosting at a very reliable price. After best website platform Hostgator you can buy hosting from Bluehost, Godaddy, Bigrock. All other platforms but you will not give 99% uptime on these hostings which you can easily get on Hostgator. So you should choose the best one which suits your budget. Hostgator is Little Cheaper, I am also using Hostgator.
But after all, it is up to you which hosting you want to buy and one right choice can help your blog a lot in Rankings. Let’s move on guys, Now you know how to choose the right Hosting. So we will learn how we can migrate a website from one Hosting to another.
How To Migrate Hosting Without Zero Downtime :
Step 1 Download all your Backup Files On old hosting
 First purchase new hosting on which you want to transfer from old one.
Now Open your Current Hosting Cpanel.
Get Hosting WordPress Website full Backup.
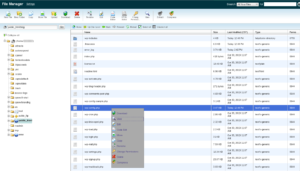
The second way to Download Backup is From File Manager
- Open public_html Folder In File Manager.
- Select All Files of public_html
- Now click right click on any file and click to compress it.
- It will reduce the size of files and save them as zip files.
- Now download these files from public_html and Save them in your system.
And with these Steps, you have completed your site’s full File backup
Now in next steps, you need to backup MySQL Database. For this read the steps below.
Step 2 SQL Database Backup Files

- Go to your current hosting Cpanel And Search MySql Database. When you Find it Click on it and Open it.
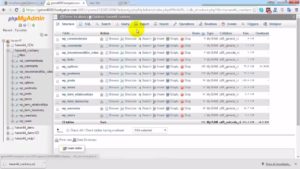
- Click on MyPhpAdmin.
- Choose the database which you want to use.
- Click on export.
Now you have the backup of the database which is required for Hosting Transfer. So now let’s start the process.
STEP 3 UPLOAD ALL OLD BACKUP FILES.
- Login to your Hosting Account
- Open your File Manager
- Open Your public_html files.
- Now the backup which you have saved on your pc or any other external source has to be uploaded there.
- Extract the Backup Files Into public_html Folder.
Step 4 Create New Database Name & Database User.
 Before Transferring Hosting and uploading SQL Database you need to change the Database Name and create Database User Name.
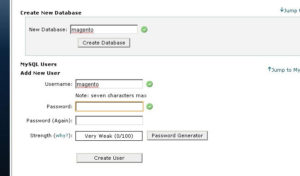
- Find MySQL Database Wizard in Cpanel and click on it.
- Create A Database and New Database Name & Database User.
- Click on Create A Database and create Database Name whichever you want to select.
- After you Select The Database Name then Click Next.
- Now Click Next on Creating Database User.
- Enter Username and Password and create your username.
- All Privileges Check options.
- Click on next step.
With this way before Hosting transfer, you have created your Database Name and Database User. Now save the information of Database New user Privately. Write down it on your notepad.
For Uploading SQL Database Go To phpmyadmin.
- Select SQL Backup Name
- Click on Import.
- Choose to browse your computer & choose Database Files and select them which you have downloaded from Cpanel SQL Database.
- For uploading SQL Files click on Go
By this process, you have completed 80 % of the migration process. Now only you have to make 4 changes next to complete this Method.
Change Old Database Name, Database User, Database Password, Table Prefix Name and Permalink Setup. (If Changes).
You can complete all these steps in just by small changes in a file called wp-Config.php.
- Open your File manager.
- Search in public_html a file called wp-config.php and click edit on it
- Like MySql Setting change your DB_Name, DB User, DB_Password which you have already saved on your notepad.
Now it is necessary to change Table Prefix you will find this in bottom change it to New SQL Database Table Prefix
Now 99% process is completed for transfer Hosting from. Now you need to change nameservers to new Hosting.
CHANGE NAMESERVERS :
 Now go to your domain manager where you have purchased your domain.
- Now change the server of new hosting in DNS.
- By this way, you can change your hosting from one to another without any problem and downtime. I hope you like how to do Without Downtime Hosting Migration.
Please share this valuable information with your Friends and Save your traffic.


![WordPress Website Maintenance Guide - 50+ Useful Tips [Infographic] WordPress Website Maintenance Guide - 50+ Useful Tips [Infographic]](https://darshansaroya.com/wp-content/uploads/2018/10/WordPress-Website-Maintenance-Guide-50-Useful-Tips-Infographic-150x150.jpg)


Leave Your Comment Here